How to Craft Your Own 3D Printed Figurine
Imagine the excitement of designing your own 3D printed custom figurines. This technology opens up a world of creativity right at your fingertips. You can bring your unique ideas to life with ease. The 3D printing industry is booming, with a market value of around $12.6 billion in 2020 and expected growth of 17% annually. This growth highlights how accessible and innovative 3D printing has become. Whether you're a hobbyist or a professional, crafting your own figurines offers endless possibilities for personalization and creativity.
Key Takeaways
-
Embrace creativity by designing your own 3D printed figurines, allowing for unique personalization that reflects your style.
-
Utilize user-friendly software like Blender or Sculptris for digital sculpting, making it accessible for beginners to create intricate designs.
-
Choose the right materials for your figurine; PLA is great for beginners, while resin offers high detail for more advanced projects.
-
Prepare your 3D file carefully by checking for errors and ensuring proper scaling to avoid printing failures.
-
Consider the pros and cons of home printing versus professional services to find the best option for your needs and budget.
-
Enhance your figurine's appearance with post-processing techniques like sanding and painting for a polished finish.
-
Troubleshoot common printing issues by adjusting settings and maintaining your printer to ensure high-quality results.
Understanding 3D Printed Custom Figurines
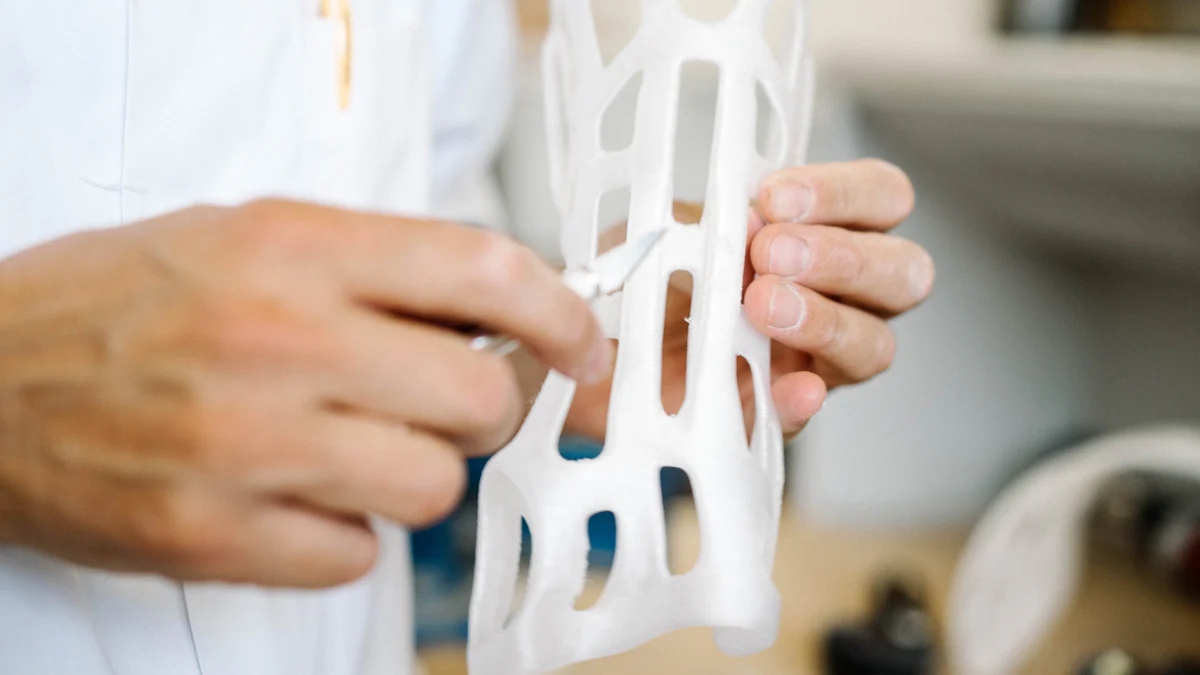
What Are 3D Printed Custom Figurines?
3D printed custom figurines are miniature models crafted using 3D printing technology. These figurines can represent anything from characters in your favorite video game to a personalized avatar of yourself. The magic lies in the ability to design every detail to your liking. You can choose the exact skin tone, clothing, and accessories, ensuring the figurine mirrors your unique style and individuality. With modern 3D printers, you can create these figures from various materials, including plastic, metal, and even resin. This versatility opens up a world of creative possibilities, allowing you to bring your imagination to life with precision and detail.
Benefits of Crafting Your Own Figurine
Personalization and Customization
Creating your own 3D printed custom figurine offers unparalleled personalization. You have the freedom to design every aspect of your figurine, from its pose to its expression. Want a figurine that looks just like you or your favorite character? You can achieve that with ease. This level of customization ensures that your figurine is truly one-of-a-kind, reflecting your personal taste and creativity. Whether you're crafting a gift for a friend or adding to your collection, the ability to personalize every detail makes these figurines special.
Cost-Effectiveness and Accessibility
3D printing technology has made crafting custom figurines more accessible than ever. Traditional methods of creating custom figures can be expensive and time-consuming. However, with 3D printing, you can produce unique designs at a fraction of the cost. The technology allows you to experiment with different designs without breaking the bank. Plus, you don't need to be a professional artist to create stunning figurines. Many user-friendly software tools are available, making it easy for anyone to start designing. This accessibility empowers you to explore your creativity and bring your ideas to life without significant financial investment.
Designing Your 3D Model
Creating a 3D model for your custom figurine is an exciting part of the process. You get to shape your ideas into a digital form, ready for printing. Let's dive into the techniques and tools that will help you bring your vision to life.
Digital Sculpting Techniques
Digital sculpting is like molding clay, but on your computer. It allows you to create intricate details and textures for your 3D printed custom figurines.
Popular Software Tools
To start digital sculpting, you'll need the right software. ZBrush is a top choice among professionals. It's known for its powerful tools that let you create high-resolution models. Artists in game development and cinema production often use ZBrush because it offers a wide range of features. However, it does have a steeper learning curve, so be prepared to invest some time in mastering it. If you're looking for something more beginner-friendly, consider trying software like Blender or Sculptris. These tools provide a good balance between functionality and ease of use.
Basic Sculpting Tips
When you begin sculpting, start with a simple shape. Focus on getting the proportions right before adding details. Use reference images to guide your design. They can help you maintain accuracy and consistency. Remember to save your work frequently. Digital sculpting can be complex, and you don't want to lose your progress. Experiment with different brushes and tools to see what works best for your style. Practice makes perfect, so don't be afraid to try new techniques.
3D Scanning Options
If sculpting from scratch feels daunting, 3D scanning offers an alternative way to create your model. It captures real-world objects and converts them into digital files.
Using a 3D Scanner
A 3D scanner can be a game-changer. It allows you to scan physical objects and turn them into digital models. This method is great if you want to replicate an existing item or create a figurine based on a real-life object. You can find handheld scanners that are easy to use and provide accurate results. Simply scan your object, and the software will generate a 3D model for you.
Converting Physical Models to Digital
If you have a physical model, you can convert it into a digital format. Photogrammetry is a technique that uses photos to create a 3D model. Take multiple pictures of your object from different angles, and use software to stitch them together. This method is cost-effective and doesn't require specialized equipment. It's perfect for capturing detailed textures and shapes.
By mastering these techniques, you'll be well on your way to designing stunning 3D printed custom figurines. Whether you choose digital sculpting or 3D scanning, the key is to experiment and have fun with the process.
Preparing Your 3D File
Before you can bring your 3D printed custom figurines to life, you need to prepare your 3D file. This step ensures that your design is ready for the printing process and will result in a high-quality figurine.
File Formats and Compatibility
When preparing your 3D model for printing, choosing the right file format is crucial. The most common format for 3D printing is STL (Stereolithography). It’s widely supported by most 3D printers and slicing software. However, other formats like OBJ and 3MF are also popular due to their ability to store more detailed information about your model, such as color and texture.
You should ensure that your chosen file format is compatible with your 3D printer and slicing software. Tools like Ultimaker Cura or PrusaSlicer can help you import, scale, and slice your model effortlessly. These user-friendly applications simplify the process, making it easier for you to get your model ready for printing.
Optimizing Your Model for Printing
Once you have your file format sorted, it's time to optimize your model for printing. This step involves checking for errors and ensuring proper scale and proportions.
Checking for Errors
Errors in your 3D model can lead to printing failures or poor-quality prints. You should perform a geometry check on your STL files to identify any holes, gaps, or other issues. Third-party software can help fix these problems, ensuring your model is watertight and ready for printing. By addressing these errors early, you can avoid wasting time and materials on failed prints.
Ensuring Proper Scale and Proportions
Scaling your model correctly is essential to achieving the desired size for your figurine. You should verify that your model's dimensions match your intended output. Most slicing software allows you to adjust the scale easily. Keep in mind the limitations of your 3D printer's build volume when setting the size. Proper scaling ensures that your figurine maintains its proportions and looks exactly as you envisioned.
By following these steps, you'll be well-prepared to create stunning 3D printed custom figurines. Whether you're a beginner or an experienced designer, taking the time to prepare your 3D file properly will lead to better results and a more satisfying printing experience.
Choosing Materials for Printing
Selecting the right material for your 3D printed custom figurines is crucial. The material you choose affects the look, feel, and durability of your figurine. Let's explore some common materials and what you should consider when making your choice.
Common 3D Printing Materials
PLA and ABS
Polylactic Acid (PLA) is a popular choice for many hobbyists. It's an environmentally friendly plastic made from renewable resources like corn starch or sugar cane. PLA is biodegradable, making it a great option if you're eco-conscious. It comes in both hard and soft forms, with hard PLA being more versatile for various applications. PLA is easy to use and doesn't require a heated bed, which makes it ideal for beginners.
Acrylonitrile Butadiene Styrene (ABS) is another widely used material. It's known for its strength and durability. ABS can withstand higher temperatures than PLA, making it suitable for parts that need to endure more stress. However, it does require a heated bed and emits fumes during printing, so proper ventilation is necessary.
Resin and Other Options
Resin is perfect for creating highly detailed figurines. It offers a smooth finish and can capture intricate details that other materials might miss. Resin printing typically uses a process called stereolithography (SLA), which involves curing liquid resin with a laser. This method produces high-quality prints but requires post-processing to remove excess resin and cure the final product.
Other materials like FLEX Filament, a type of thermoplastic polyurethane (TPU), offer flexibility and impact resistance. FLEX filament is durable and won't warp, making it suitable for parts that need to bend or flex. It's part of the thermoplastic polymers family, which includes a wide range of materials used in various 3D printing processes.
Factors to Consider When Selecting Materials
When choosing a material for your figurine, consider the following factors:
-
Purpose: Determine what you want your figurine to do. If it's purely decorative, PLA might be sufficient. For functional parts, ABS or TPU could be better choices.
-
Detail: If your design includes fine details, resin might be the best option due to its precision.
-
Durability: Consider how much wear and tear your figurine will experience. ABS and TPU offer more durability than PLA.
-
Environment: Think about where your figurine will be displayed. PLA is sensitive to heat, so it's not ideal for outdoor use.
By understanding these materials and their properties, you can make an informed decision that suits your project's needs. Whether you prioritize detail, durability, or environmental impact, there's a material out there that will help you create the perfect 3D printed custom figurine.
The Printing Process
Home Printing vs. Professional Services
When it comes to 3D printing your custom figurines, you have two main options: home printing and professional services. Each choice has its own set of advantages and drawbacks.
Pros and Cons of Each Option
Home Printing:
-
Pros:
-
Convenience: You can print anytime without waiting for shipping.
-
Control: You have full control over the printing process, allowing for immediate adjustments.
-
Cost-Effective: For frequent printing, owning a printer can be more economical in the long run.
-
-
Cons:
-
Initial Investment: Buying a 3D printer can be expensive.
-
Quality Limitations: Home printers might not match the quality of professional-grade machines, especially for intricate designs.
-
Maintenance: You need to handle repairs and upkeep.
-
Professional Services:
-
Pros:
-
High Quality: Professional printers offer superior quality, especially for complex designs and challenging materials.
-
No Maintenance: You don't have to worry about printer upkeep or repairs.
-
Access to Specialized Materials: You can use materials that might be too costly or difficult to handle at home.
-
-
Cons:
-
Cost: Ordering prints can be more expensive, especially for one-off projects.
-
Limited Control: You rely on the service provider for adjustments and timelines.
-
Waiting Time: You may experience delays due to shipping and processing times.
-
Choosing between home printing and professional services depends on your needs, budget, and how often you plan to print. If you value convenience and control, a home printer might be the way to go. However, if quality and material variety are your priorities, professional services could be worth the investment.
Setting Up Your 3D Printer
If you decide to print at home, setting up your 3D printer correctly is crucial for achieving the best results. Proper calibration and maintenance ensure that your printer runs smoothly and produces high-quality prints.
Calibration and Maintenance Tips
-
Level the Bed: Ensure the print bed is level before starting any print. An uneven bed can lead to poor adhesion and failed prints. Use a piece of paper to check the distance between the nozzle and the bed, adjusting as needed.
-
Check the Nozzle: Regularly inspect the nozzle for clogs or wear. A clean nozzle ensures smooth filament flow and prevents print defects. If you notice any issues, clean or replace the nozzle.
-
Update Firmware: Keep your printer's firmware up to date. Manufacturers often release updates that improve performance and fix bugs. Check the manufacturer's website for the latest version.
-
Lubricate Moving Parts: Apply lubricant to the printer's moving parts to reduce friction and wear. This helps maintain smooth operation and extends the life of your printer.
-
Monitor Temperature Settings: Ensure that the printer's temperature settings match the filament you're using. Incorrect temperatures can cause warping or poor layer adhesion.
By following these tips, you'll keep your 3D printer in top condition, ensuring consistent and high-quality prints. Whether you're a beginner or an experienced user, proper setup and maintenance are key to successful 3D printing.
Tips for Achieving the Best Results
Post-Processing Techniques
After printing your 3D figurine, you can enhance its appearance with some post-processing techniques. These steps will help you achieve a polished and professional look.
Sanding and Smoothing
Sanding is a crucial step in refining your 3D printed figurine. It removes layer lines and imperfections, giving your model a smooth finish. Start with a coarse-grit sandpaper, like 100 or 150 grit, to tackle rough areas. Gradually move to finer grits, such as 220 and 400, for a smoother surface. Use circular motions to avoid creating scratches. For intricate details, consider using a small file or a sanding sponge. Remember to wear a mask to protect yourself from dust.
Painting and Finishing Touches
Painting brings your figurine to life with color and detail. Begin by applying a primer to ensure the paint adheres well. Choose acrylic paints for their versatility and ease of use. Use fine brushes for detailed work and larger brushes for broad areas. Layer the paint, starting with base colors and adding highlights and shadows for depth. Seal your work with a clear coat to protect the paint and add a glossy or matte finish. Experiment with different techniques, like dry brushing or washes, to achieve unique effects.
Troubleshooting Common Issues
Even with careful preparation, you might encounter some challenges during the 3D printing process. Here are solutions to common problems you may face:
-
Warping: If your model's edges lift from the print bed, check the bed temperature and ensure it's level. Use a heated bed or adhesive to improve adhesion.
-
Stringing: Thin strands of filament between parts indicate stringing. Reduce the print temperature or adjust the retraction settings in your slicer software.
-
Layer Shifts: Misaligned layers can result from loose belts or pulleys. Tighten them and ensure the printer is on a stable surface.
-
Under-Extrusion: Gaps in layers suggest under-extrusion. Check the nozzle for clogs and ensure the filament feeds smoothly.
-
Overhangs and Bridges: If overhangs sag, adjust the cooling settings or add supports in your slicer software.
By addressing these issues, you'll improve the quality of your prints and enjoy a smoother 3D printing experience. Remember, practice makes perfect, so don't hesitate to experiment and learn from each project.
You've now explored the exciting world of crafting your own 3D printed custom figurines. From designing your model to choosing the right materials and perfecting the printing process, each step offers a chance to express your creativity. This journey not only allows you to create unique and personalized characters but also provides a meaningful way to make keepsakes or thoughtful gifts. Embrace the possibilities that 3D printing technology offers and enjoy the creative adventure. Dive in, experiment, and let your imagination run wild as you bring your ideas to life.
FAQ
What are 3D Printed Figurines?
3D printed figurines are custom models crafted using a 3D printer. These can be anything from human figures to action figures or even animals, all tailored to your preferences. The printer constructs these figurines layer by layer using resin, resulting in smooth, colorful, and detailed creations. They make excellent collectibles, gifts, or personal decorations. To get your own custom figurine, you simply upload your 3D model to an online platform. At Multicolor3DPrinter, we use Material Jetting technology to ensure your figurine looks exactly how you imagined.
Can you have a 3D Printed Figurine of Yourself?
Absolutely! You can have a 3D printed figurine that looks just like you, complete with real skin tones and intricate details. These figurines serve as perfect personal keepsakes, unique gifts, or special home decor items. At Multicolor3DPrinter, we utilize the Multicolor3DPrinter-C3D01 resin 3D printer to create them. This technology allows for high customization, making each figurine unique to you. It's also a cost-effective way to produce one-of-a-kind pieces, ensuring detailed results for a lifelike appearance.
How to Make Your Own 3D Printed Figurine?
Creating your own 3D printed figurine is a budget-friendly way to obtain unique and personalized models. You can design custom pieces at a lower cost compared to traditional manufacturing methods, making it an economical choice for one-of-a-kind creations. Start by designing your model using digital sculpting software or by scanning an existing object. Once your design is ready, prepare the 3D file and choose the right material for printing. Finally, decide whether to print at home or use professional services to bring your figurine to life.
What Materials Can You Use for 3D Printing Figurines?
You have several options when it comes to materials for 3D printing figurines. PLA and ABS are popular choices due to their ease of use and durability. PLA is eco-friendly and ideal for beginners, while ABS offers more strength and can withstand higher temperatures. For highly detailed figurines, resin is an excellent choice, providing a smooth finish and capturing intricate details. Consider the purpose, detail, and durability you need when selecting a material.
Is 3D Printing Cost-Effective?
Yes, 3D printing is a cost-effective method for creating custom figurines. It allows you to experiment with different designs without incurring high costs. Traditional manufacturing methods can be expensive and time-consuming, but 3D printing offers a more economical solution. You can produce unique designs at a fraction of the cost, making it accessible for hobbyists and professionals alike.
Can You Print Figurines at Home?
You can print figurines at home if you have a 3D printer. Home printing offers convenience and control over the process, allowing you to make immediate adjustments. However, it requires an initial investment in a printer and ongoing maintenance. If you prefer high-quality prints or access to specialized materials, professional services might be a better option. They provide superior quality and eliminate the need for printer upkeep.
How Do You Ensure High-Quality Prints?
To achieve high-quality prints, focus on proper setup and maintenance of your 3D printer. Level the print bed, check the nozzle for clogs, and keep the firmware updated. Use the correct temperature settings for your chosen material and apply lubricant to moving parts. Additionally, optimize your 3D file by checking for errors and ensuring proper scale and proportions. These steps will help you produce consistent and high-quality prints.
What Post-Processing Techniques Can Enhance Your Figurine?
Post-processing techniques can significantly enhance the appearance of your 3D printed figurine. Sanding removes layer lines and imperfections, giving your model a smooth finish. Start with coarse-grit sandpaper and gradually move to finer grits. Painting adds color and detail, bringing your figurine to life. Apply a primer, use acrylic paints, and seal your work with a clear coat. Experiment with different techniques to achieve unique effects and a polished look.
What Are Common Issues in 3D Printing and How to Troubleshoot Them?
Common issues in 3D printing include warping, stringing, layer shifts, under-extrusion, and problems with overhangs. To troubleshoot these, ensure the print bed is level and the temperature settings are correct. Adjust retraction settings to reduce stringing and tighten belts to prevent layer shifts. Check the nozzle for clogs to address under-extrusion. For overhangs, adjust cooling settings or add supports in your slicer software. By addressing these issues, you'll improve the quality of your prints and enjoy a smoother 3D printing experience.
See Also
Crafting Unique Figurines: A Complete Design Guide
Building Custom Action Figures Tailored Just for You
A Comprehensive Approach to Personalizing Roblox Figures


