Step-by-Step Guide to Create and Rig a Custom Monster in Roblox Studio

Introduction
In this tutorial, I will guide you through the process of creating and rigging a custom monster in Roblox Studio. We will start by creating the monster in Blender, separating the body parts, and then importing them into Roblox Studio where we will rig and animate the monster. By the end of this tutorial, you will have a fully rigged and animated custom monster ready to be used in your Roblox game.
Creating the Monster in Blender
Today, we’ll be creating a custom monster in Blender and then rigging it in Roblox Studio. Here’s a step-by-step guide on how to create the monster in Blender:
- Start by adding a plane in Blender and then apply a mirror modifier.
- Add a skin modifier and a subdivision surface modifier.
- In edit mode, use vertex select to merge vertices at the center for different body parts.
- Extrude the vertices to create the hips, legs, torso, arms, and head of the monster.
- Apply all the modifiers and then separate the parts of the monster using the x-ray mode in Blender.
Adding Modifiers and Editing the Monster
After creating the monster in Blender, the next step is to add modifiers and edit the monster to prepare it for rigging in Roblox Studio. Here’s how to do it:
- Start by adding a plane in Blender and then apply a mirror modifier.
- Next, add a skin modifier and a subdivision surface modifier to the plane.
- In edit mode, use vertex select to merge vertices at the center for different body parts.
- Extrude the vertices to create the hips, legs, torso, arms, and head of the monster.
- Apply all the modifiers and then separate the parts of the monster using the x-ray mode in Blender.
- Once the parts are separated, apply the shade smooth and fill in missing faces if needed.
- Export the monster as an FBX file and import it into Roblox Studio.

Separating the Monster Parts
After creating the custom monster in Blender, the next step is to separate the different body parts to prepare them for rigging in Roblox Studio. Here’s how to do it:
- Enter x-ray mode in Blender to see the single vertices of the monster’s body.
- Using the Line Select tool, fill in missing faces on each body part by pressing “Alt” along the edges and then clicking “F”.
- Grab all the vertices of a single body part, such as an arm, and separate it by pressing “P” and selecting “by selection”.
- Repeat the process for all the body parts, including the legs, torso, arms, head, and any additional parts you want to separate.
- Once all the parts are separated, export the monster as an FBX file to import into Roblox Studio.

Exporting the Monster from Blender
Once you have created and edited the custom monster in Blender, the next step is to export it as an FBX file to import it into Roblox Studio. Here’s a step-by-step guide on how to export the monster from Blender:
- Apply all the modifiers on the monster in Blender by right-clicking and selecting “Shade Smooth” to smoothen out the surfaces.
- Separate the different body parts of the monster using x-ray mode in Blender and then fill in any missing faces using the line select tool.
- Once the parts are separated and edited, grab all the vertices of a single body part, such as an arm, and separate it by pressing “P” and selecting “by selection”.
- Repeat the separation process for all the body parts, including the legs, torso, arms, head, and any additional parts you want to separate.
- After separating all the parts, export the monster as an FBX file by clicking on “File” and selecting “Export” then “FBX”.
Importing the Monster into Roblox Studio
Now that we have created and rigged the custom monster in Blender, it’s time to import it into Roblox Studio. Follow these steps to import the monster:
- Open Roblox Studio and go to the Asset Manager.
- Click on “Meshes” and then select “Bulk Import”.
- Locate the FBX file of the monster that you exported from Blender and select it.
- After selecting the file, you can rescale it if needed and then click “Apply All”.
- The monster’s body parts should now be imported into Roblox Studio.
- Create a model in the workspace and name it “monster”.
- Move the individual body parts of the monster into the “monster” model.
Preparing the Monster in Roblox Studio
Now that we have created and edited the custom monster in Blender, the next step is to prepare it for rigging in Roblox Studio. Here’s how to do it:
- Open Roblox Studio and go to the Asset Manager.
- Click on “Meshes” and then select “Bulk Import”.
- Locate the FBX file of the monster that you exported from Blender and select it.
- After selecting the file, you can rescale it if needed and then click “Apply All”.
- Create a model in the workspace and name it “monster”.
- Move the individual body parts of the monster into the “monster” model.
Naming and Organizing the Monster Parts
After creating and rigging a custom monster in Roblox Studio, it’s essential to name and organize the different body parts. Here’s a step-by-step guide on how to do it:
- Create a model in the workspace and name it “monster”.
- Move the individual body parts of the monster into the “monster” model.
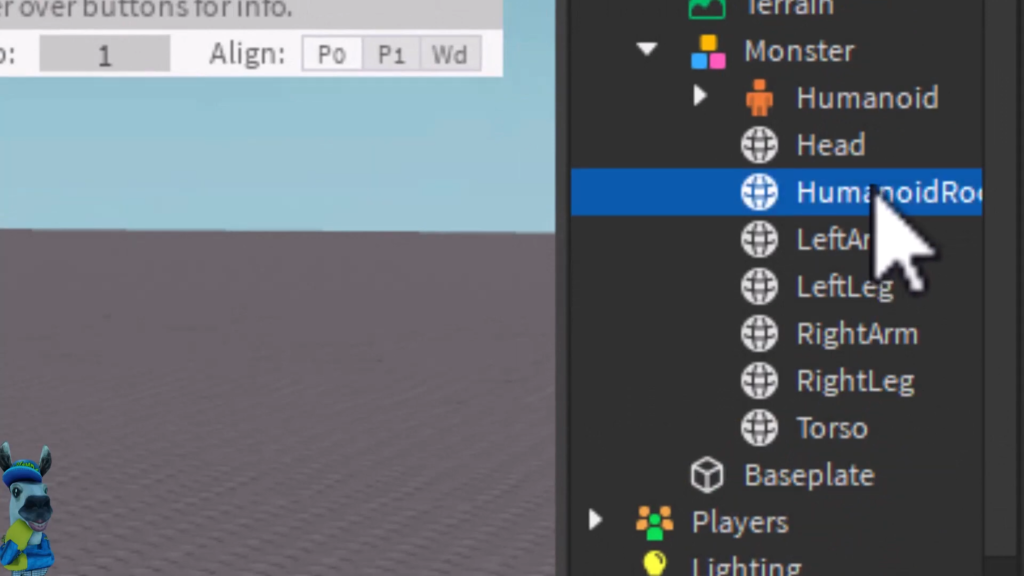
- For each body part, use the “Alt” key and click on the part to name them appropriately. For example, name each part with descriptive titles such as “torso”, “left arm”, “right arm”, “left leg”, “right leg”, and “head”.
- Set transparency to 1 for the “humanoid root part” so it remains hidden.
- Add a humanoid inside the monster and change the display to “none”.
- Use the “rig edit light” tool to rig the monster by creating joints between the “humanoid root part” and each body part including the torso, head, arms, and legs.
- After rigging, move each body part accordingly so that they align with the joints for smooth and realistic movements.
- Finally, use the “Avatar and Animation Editor” to create and customize animations for the monster, allowing movement for the entire body or specific parts such as the arms, legs, and head.
Setting Up the Humanoid and Rig
To set up the humanoid and rig in Roblox Studio, first, create a model in the workspace and name it “monster”. Then, move the individual body parts of the monster into the “monster” model.
Next, name each body part appropriately using the “Alt” key and clicking on the part. For example, name each part with descriptive titles such as “torso”, “left arm”, “right arm”, “left leg”, “right leg”, and “head”.
Set transparency to 1 for the “humanoid root part” so it remains hidden. Add a humanoid inside the monster and change the display to “none”.
Use the “rig edit light” tool to rig the monster by creating joints between the “humanoid root part” and each body part, including the torso, head, arms, and legs.
After rigging, move each body part accordingly so that they align with the joints for smooth and realistic movements.
Finally, use the “Avatar and Animation Editor” to create and customize animations for the monster, allowing movement for the entire body or specific parts such as the arms, legs, and head.
Rigging the Monster in Roblox Studio
Now that we have the custom monster imported into Roblox Studio, it’s time to rig and animate the monster for use in your game. Here’s a step-by-step guide on how to rig the monster in Roblox Studio:
- Create a model in the workspace and name it “monster”.
- Move the individual body parts of the monster into the “monster” model.
- For each body part, use the “Alt” key and click on the part to name them appropriately. For example, name each part with descriptive titles such as “torso”, “left arm”, “right arm”, “left leg”, “right leg”, and “head”.
- Set transparency to 1 for the “humanoid root part” so it remains hidden.
- Add a humanoid inside the monster and change the display to “none”.
- Use the “rig edit light” tool to rig the monster by creating joints between the “humanoid root part” and each body part including the torso, head, arms, and legs.
- After rigging, move each body part accordingly so that they align with the joints for smooth and realistic movements.
- Finally, use the “Avatar and Animation Editor” to create and customize animations for the monster, allowing movement for the entire body or specific parts such as the arms, legs, and head.
Adjusting the Joints and Positions
Now that we have our custom monster imported into Roblox Studio, it’s time to adjust the joints and positions to ensure smooth and realistic movements. Here’s a step-by-step guide on how to do it:
- Create a model in the workspace and name it “monster”.
- Move the individual body parts of the monster into the “monster” model.
- For each body part, use the “Alt” key and click on the part to name them appropriately, such as “torso”, “left arm”, “right arm”, “left leg”, “right leg”, and “head”.
- Set transparency to 1 for the “humanoid root part” so it remains hidden. Add a humanoid inside the monster and change the display to “none”.
- Use the “rig edit light” tool to adjust the joints between the “humanoid root part” and each body part, including the torso, head, arms, and legs.
- Move each body part accordingly so that they align with the joints for smooth and realistic movements.
- Use the “Avatar and Animation Editor” to create and customize animations for the monster, allowing movement for the entire body or specific parts such as the arms, legs, and head.
Closing the Edit Rig Editor
Now that we have our character readily rigged, we can close out the edit rig editor. Simply click on the “X” in the top right corner of the rig editor to close it. Now we can move on to the next step of animating our custom monster in Roblox Studio.
Animating the Monster in Roblox Studio
Now that we’ve successfully rigged the custom monster in Roblox Studio, it’s time to bring it to life by animating it. Here’s a step-by-step guide on how to animate the monster in Roblox Studio:
- Open the Avatar and Animation Editor in Roblox Studio.
- Hover your mouse around the monster to see a blue line appear around it.
- Click on the monster to create keyframes and begin animating its movements.
- Add keyframes for the entire body or specific parts such as the arms, legs, and head.
- Rotate and move the body parts to create realistic and smooth movements for the monster.
- Explore the various animation options and customize the movements to bring the monster to life in your game.
Conclusion
After going through the process of creating and rigging a custom monster in Roblox Studio, you now have a fully rigged and animated custom monster ready to be used in your Roblox game. By following the step-by-step guide, you’ve learned how to create a monster in Blender, add modifiers, separate the parts, export the monster into Roblox Studio, and rig and animate the monster. Now, you have the skills and knowledge to create unique and custom monsters for your Roblox games, adding a new dimension of creativity and gameplay to your projects.


